You can remove a video background for DaVinci Resolve Free by having an AI model create a transparent clip, then placing that clip above a new background in your timeline. You do not need a green screen or Studio's Magic Mask for this workflow.
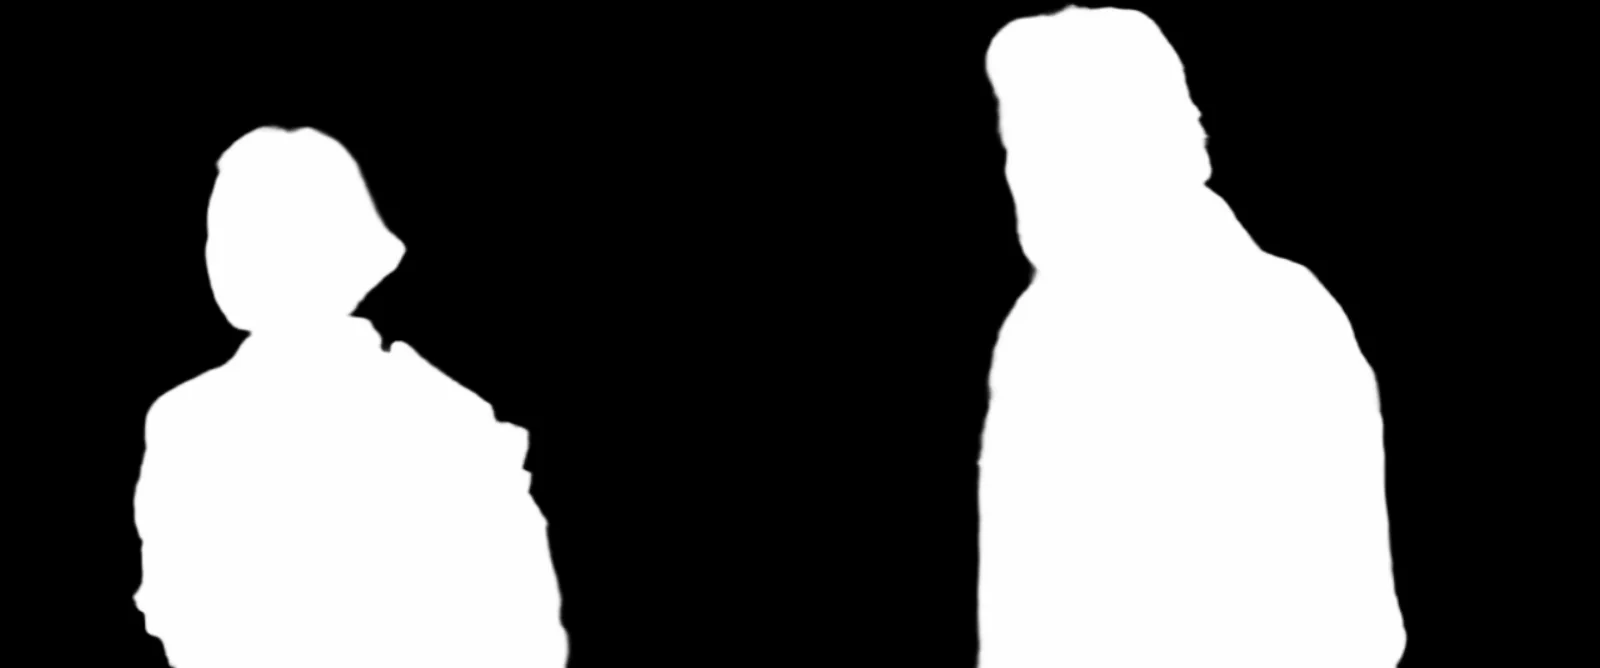
The comparison above shows the result on real footage: two people in a room, with one walking across the other and leaving the shot. The bottom panels were composited and rendered in Resolve Free 21.1 on macOS. The black-and-white panel shows the AI's decision about which pixels to keep.
It works, but it is not a perfect cutout. Hair edges are softened, and the dark background makes a warm fringe easier to see. This tutorial walks through the working file handoff and the checks that tell you whether the result is good enough for your edit.
Free refers to the Resolve edition. The hosted AI service used here charges for processing. Our five-second clip had an estimated model cost of $0.25, based on fal's listed $0.05 per second rate retrieved on September 18, 2026. Assistant access is separate. Check the current Bria model page before running your footage.
You can inspect the result without another paid model call: download the source, transparent cutout, matte, comparison, and editable Resolve project. The bundle is about 103 MB, mostly the transparent ProRes file.
What replaces Magic Mask here?
Magic Mask belongs to DaVinci Resolve Studio. Blackmagic lists it among the Studio AI features. An external AI model can do the subject-isolation step, while Resolve Free handles the resulting transparent video. It does not unlock Magic Mask inside the editor.
Three terms make the rest easier to follow:
- Matte: a grayscale image that describes what stays visible. White keeps the subject, black removes the background, and gray represents partial transparency.
- Alpha channel: that transparency information stored alongside the color image in the video file.
- Composite: the combined picture made by placing the transparent foreground over another image or video.
For this example, Codex, OpenAI's coding assistant, handled the files and model request. fal hosts the AI models; Bria VRMBG 3.0 is the background-removal model we used. MCP is the connection that lets the assistant call fal's tools. None of these is a Resolve effect you need to find in the Effects panel.
If the connection is new to you, follow the Codex and fal setup steps in our captions tutorial, then return here. You need an assistant with local file access and a fal account with billing available. The model runs on a hosted service, so this route uploads the selected footage.
1. Start with a short, finished shot
Put the shot you want to process in a separate working folder. Trim a short test before submitting a long recording, and keep the original. If the shot comes from a larger Resolve edit, export that section with the frame rate and dimensions you intend to use.
Choose a test that includes the difficult moment: a turn of the head, a hand crossing the body, motion blur, or someone entering the frame. A clean opening frame can hide a mask that falls apart halfway through the shot.
Our source is a five-second, 1280×534, 24 fps excerpt from the open film Tears of Steel. It contains 120 frames and no audio. We kept the film's wide aspect ratio so this test would change the background without also changing the composition.
For your own project, keep the original audio on its existing track. Treat the AI cutout as a replacement picture layer; there is no reason to send dialogue through a visual processing step just to preserve its timing.
2. Ask the assistant for a transparent editing file
The output format matters as much as the model. A video can look like it has a black background because a player is displaying transparency over black, or because black has been permanently baked into the pixels. Only the first will reveal a new background underneath it.
We requested a QuickTime MOV with ProRes 4444 and alpha. The returned file imported directly into our macOS Resolve Free installation. This is the tested handoff; codec support can differ across operating systems and versions, so run a short import test on your setup.
Here is a prompt to adapt:
Remove the background from source.mp4 for DaVinci Resolve Free.
Keep both people and their original motion. Leave the source unchanged.

Use the connected fal MCP tools. Check the current Bria video
background-removal v3 schema and pricing. I authorize uploading
this five-second test clip and spending up to $0.50 on one run.
Stop if the estimate exceeds that limit.

Return a transparent ProRes MOV at the original dimensions and
frame rate. Do not crop or zoom the picture. This test is silent.
Save the original output as cutout.mov and retain the job receipt.

Check the actual codec, alpha channel, duration, and frame count.
Make a black-and-white alpha preview for inspection. Report any
provider warning or mismatch before preparing the Resolve import.
The request to “keep both people” communicates your intention to the assistant. This endpoint does not expose a text prompt or a person-selection control; it decides the foreground automatically. Review which subjects it actually retained.
Our submitted settings were:
| Setting | Value |
|---|---|
| Endpoint | bria/video/background-removal/v3 |
| Background | Transparent |
| Output container and codec | mov_proresks |
| Auto zoom | false |
| Preserve audio | false, because the test was silent |
The endpoint schema documents these options. Request transparency explicitly: the documented background default is black. Also inspect any returned warning, since an incompatible codec can cause a fallback to an opaque background.
An assistant connected to the hosted MCP server still needs to upload the file bytes; a path on your computer is not a public video URL. It should complete the upload, submit one job, follow that job to completion, and download the actual result.
3. Check the file before importing it
Ask the assistant to inspect the returned file, rather than trusting its .mov extension. Our result was:
| Check | Observed result |
|---|---|
| Codec and profile | ProRes 4444 |
| Pixel format | yuva444p12le, including alpha |
| Dimensions | 1280×534 |
| Frame rate | 24 fps |
| Duration and frame count | 5 seconds, 120 frames |
| Provider warning | None |
The alpha plane contained both transparent and opaque regions throughout the clip. That establishes that transparency survived the export. It does not establish that every hair or jacket edge was classified correctly.
The transparent file is about 96 MB. That is much larger than a small delivery MP4, but it preserves the editable transparency we need. Keep this intermediate file even after exporting the finished composite.
If you already received an opaque H.264 MP4, converting it to ProRes does not restore the missing alpha channel. Go back to the model output settings. Similarly, avoid asking for a green background and then removing that green again; the transparent output already contains the mask.
4. Place the cutout above your replacement background
In Resolve's Edit page:
- Import
cutout.movand your replacement background using File → Import → Media. - Put the background image or video on V1.
- Place the cutout on V2, directly above it, with their starts aligned.
- Extend or trim the background to cover the whole foreground clip.
- Move the playhead into the overlap. You should see the lower track around the people.
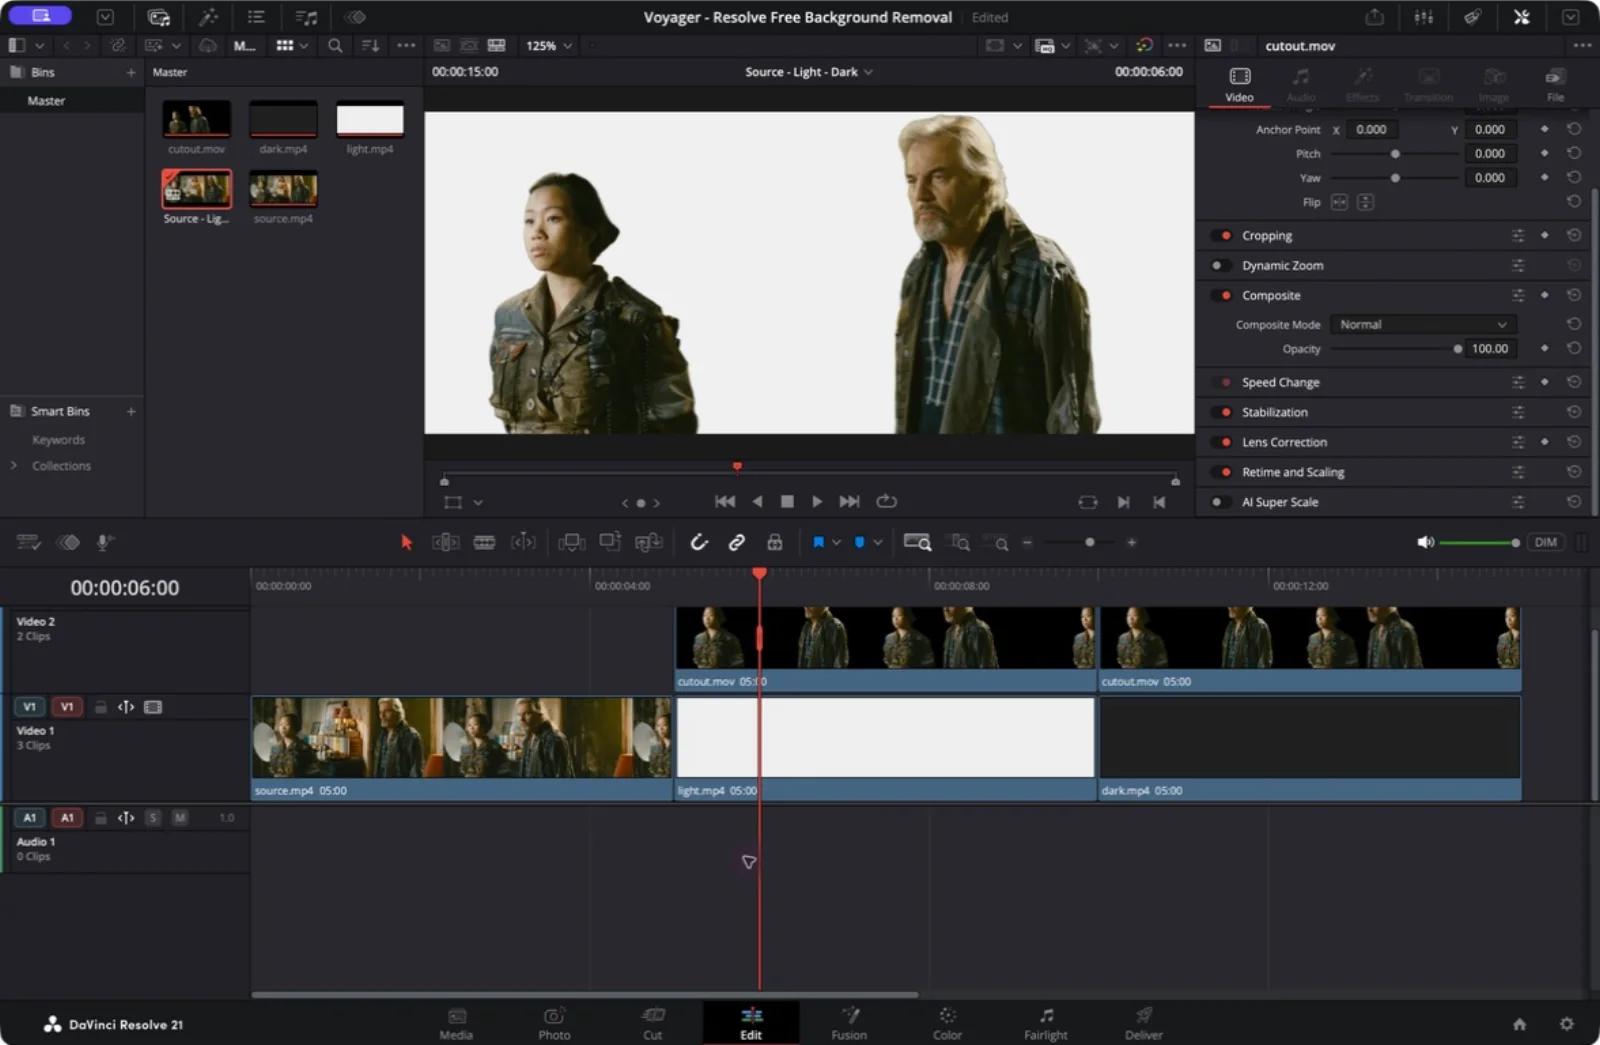
Leave Composite Mode at Normal and Opacity at 100% for this basic setup. Lowering opacity makes the people translucent too; it is not a substitute for removing the background.
If the shot already exists on V1, do this in a duplicate timeline or separate test timeline. An original, opaque copy underneath the cutout will show the old room through the transparent areas. Put the intended replacement background underneath instead.
To follow our example, import the bundled DRP through Resolve's Project Manager. If media appears offline, select the source clips in the Media Pool and use Relink Selected Clips to point to the extracted bundle folder. The timeline contains the original at 0–5 seconds, a light composite at 5–10 seconds, and a dark composite at 10–15 seconds.
5. Inspect the mask over light and dark backgrounds
A dark background can hide a dark outline. A light background can hide a bright one. Test both before choosing a background that flatters the result.
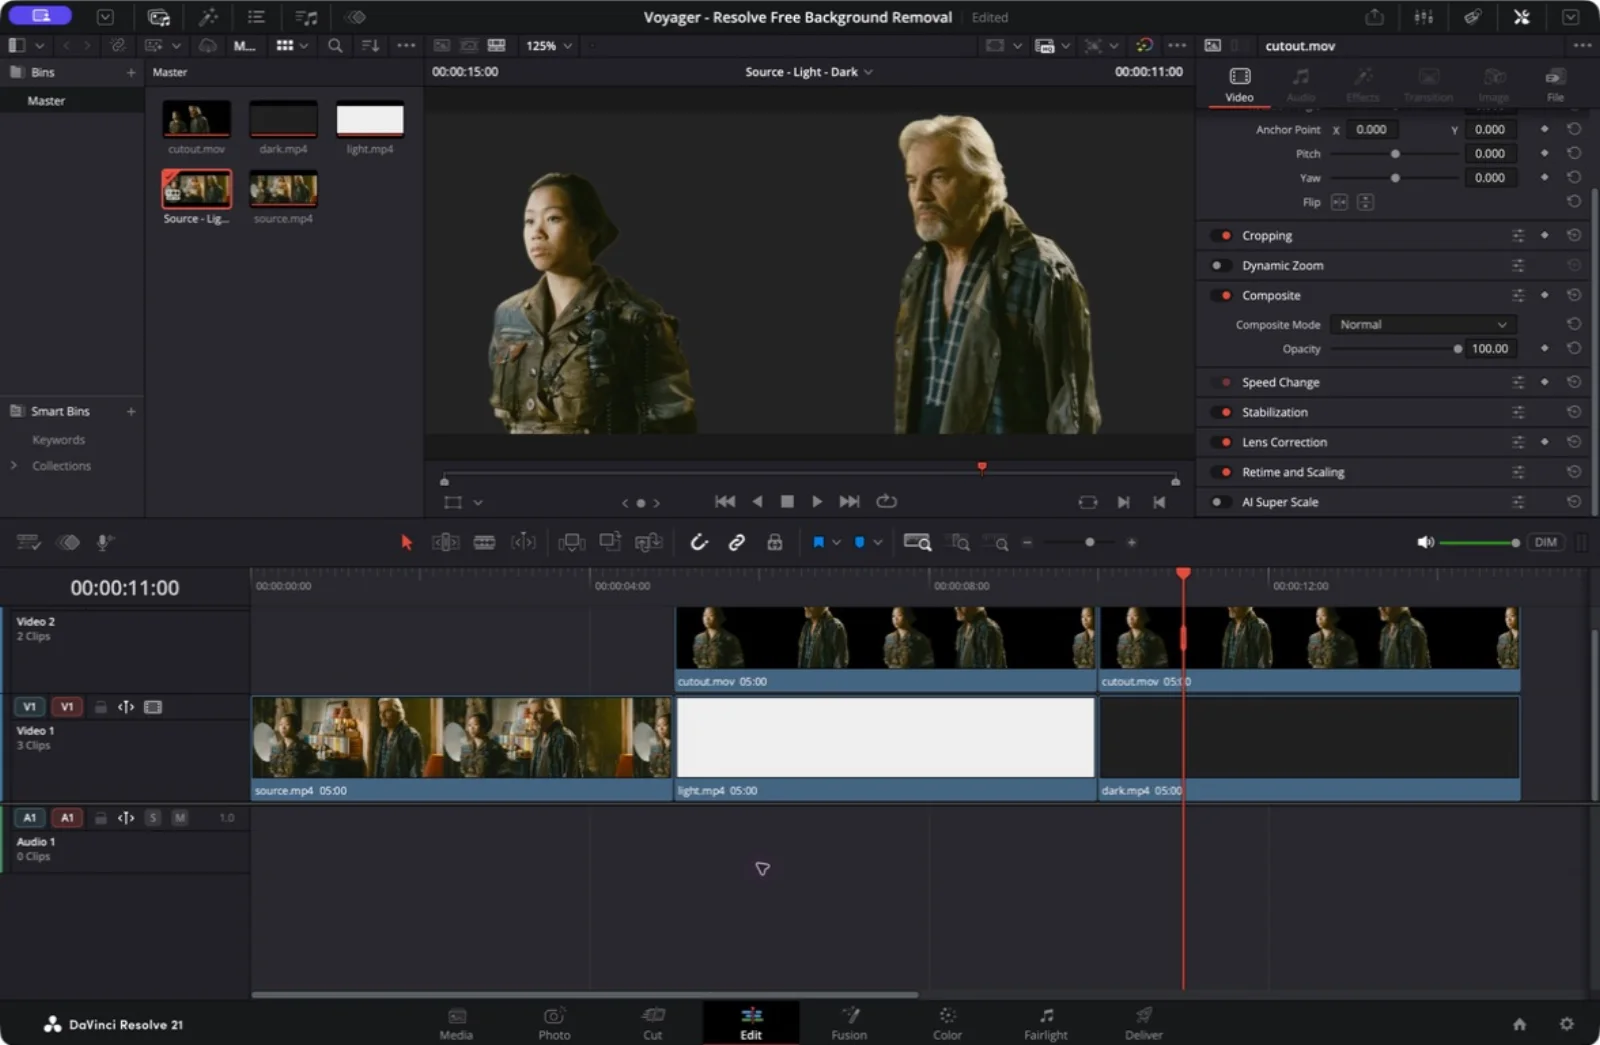
Scrub through the clip, then watch it at normal speed. Check the silhouette, gaps between arms and bodies, overlapping people, and the moment a subject leaves the frame. Look for background fragments that remain attached, missing parts of the subject, and edges that change shape from frame to frame.
In this test, the room disappears and both people remain visible as the man crosses in front of the woman. At full size, however, fine hair is simplified and a warm edge remains around parts of the silhouette. The original room's lighting also stays on their faces and clothing. A new background does not relight the subject.
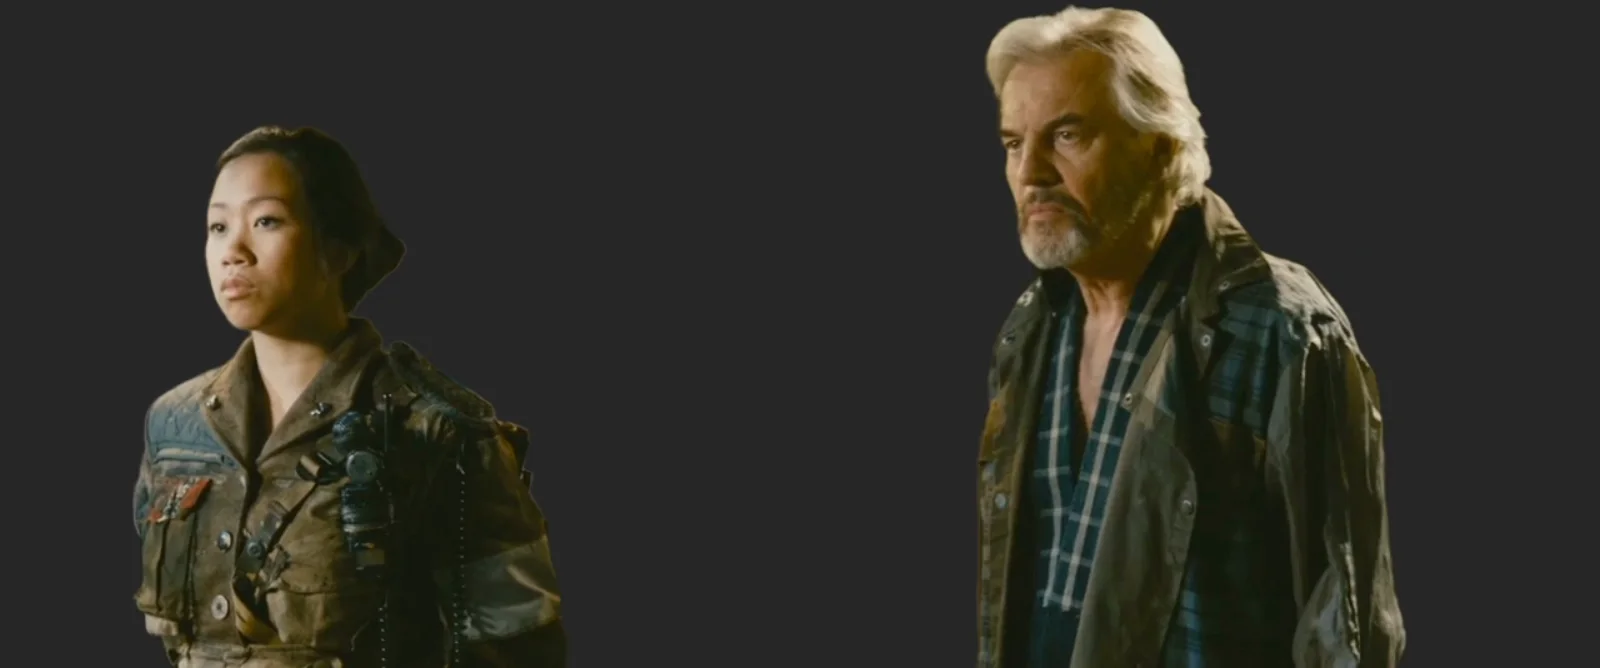
Judge the result at its intended viewing size. A small presenter overlay may tolerate edges that fail in a full-screen close-up. If the mask removes a hand or visibly flickers, try a different shot or model, or plan a manual matte correction. Hiding the problem against a similar-colored background does not fix the underlying selection.
6. Export the finished composite
Once the foreground and background look right, open Deliver, choose your delivery format, and confirm the timeline resolution and frame rate. Add the job to the render queue and render it.
A finished video with the new background baked in can use an ordinary H.264 delivery file. It no longer needs transparency. Keep cutout.mov for future background changes; the finished MP4 cannot separate those layers again.
Our native comparison export was 1280×534, 24 fps, 15 seconds, and 360 frames. The web comparison at the top arranges its three five-second sections alongside an extracted matte preview. It does not show an alternative compositor's version of the Resolve result.
If your destination is a vertical social video, make that composition deliberately after the cutout works. Our vertical video tutorial covers Fit, Fill, and position keyframes. Changing a background alone does not keep a moving person inside a portrait crop.
When is this worth using?
This route makes sense when you have ordinary footage, need a short cutout, and want to finish the edit in Resolve Free. It is particularly useful when an assistant can handle the upload, model request, and file checks while you judge the result in your timeline.
It is less attractive when footage must stay local, when you need precise control over which overlapping person to select, or when many difficult shots need continuous matte refinement. Studio's integrated tools or a dedicated rotoscoping workflow may fit that work better. See Resolve Free vs Studio for the wider edition comparison.
The practical checkpoint is simple: get one short transparent clip into Resolve, inspect it in motion, and render it before processing the rest of your project.
Test method, downloads, and footage credit
Tested on September 18, 2026, in DaVinci Resolve Free 21.1 on macOS. One Bria VRMBG 3.0 job was submitted through fal's official hosted MCP service using a local client. Codex prepared the files and an FCPXML timeline, then used Resolve's interface to import, inspect, render, and export the project. No Resolve scripting bridge, Magic Mask, manual matte cleanup, or paid Resolve effect was used.
The source and returned cutout each contain 120 frames at 24 fps. File inspection checked the codec, alpha, dimensions, and timing; contact sheets and full-size frames were used to inspect the native render. This is one shot and one model run, not a comparison of models or a guarantee for other footage or operating systems.
The downloadable bundle includes the original silent excerpt, untouched transparent model output, grayscale matte preview, two background plates, native comparison video, four-panel preview, README, and DRP. The native H.264 QuickTime export was remuxed to MP4 without re-encoding the video. The matte MP4 is a viewing copy, not a transparent foreground file.
All film imagery in this article and its downloads comes from Tears of Steel: (CC) Blender Foundation | mango.blender.org, directed by Ian Hubert. The footage is available under Creative Commons Attribution 3.0; see the project's sharing terms. We excerpted seconds 178–183, removed audio, processed the background, and resized and labeled comparison views. The performers do not endorse the tools demonstrated here.
Make your next project in Voyager
Create an account, download Voyager, and start making.