Changing a DaVinci Resolve timeline to 1080×1920 gives you a vertical video. It does not guarantee that the important part of your horizontal footage will still be visible.
The silent comparison above shows three versions of the same 12-second clip, rendered in DaVinci Resolve Free 21.1:
- Fit keeps the entire horizontal picture, with empty space above and below it.
- Center crop fills the portrait frame, but the moving subject leaves the picture.
- Keyframed fills the frame and changes the horizontal position as the subject moves.
Pause at three seconds: the center crop looks fine. Continue to six seconds and the subject disappears. That is the difference between choosing a vertical resolution and actually reframing a shot.
This tutorial walks through both jobs. You do not need Studio's Smart Reframe feature or a paid plugin. Download the source clip, three renders, and editable Resolve project if you want to reproduce the example.
1. Make a separate portrait timeline
Use a separate timeline or project so you can keep the horizontal edit. For a fresh project:
- Open Project Settings using the gear at the bottom right.
- In Master Settings → Timeline Format, set the timeline resolution to 1080×1920. The Use vertical resolution option is another way to switch the dimensions of an appropriate preset.
- Set the frame rate before building the edit. Our sample is 24 fps, so its timelines are also 24 fps.
- Save, import the footage, and create a timeline using those settings.
The order matters: 1080 is the width and 1920 is the height. This is a 9:16 frame. The source in our test is the opposite shape, a 16:9, 3840×2160 video.
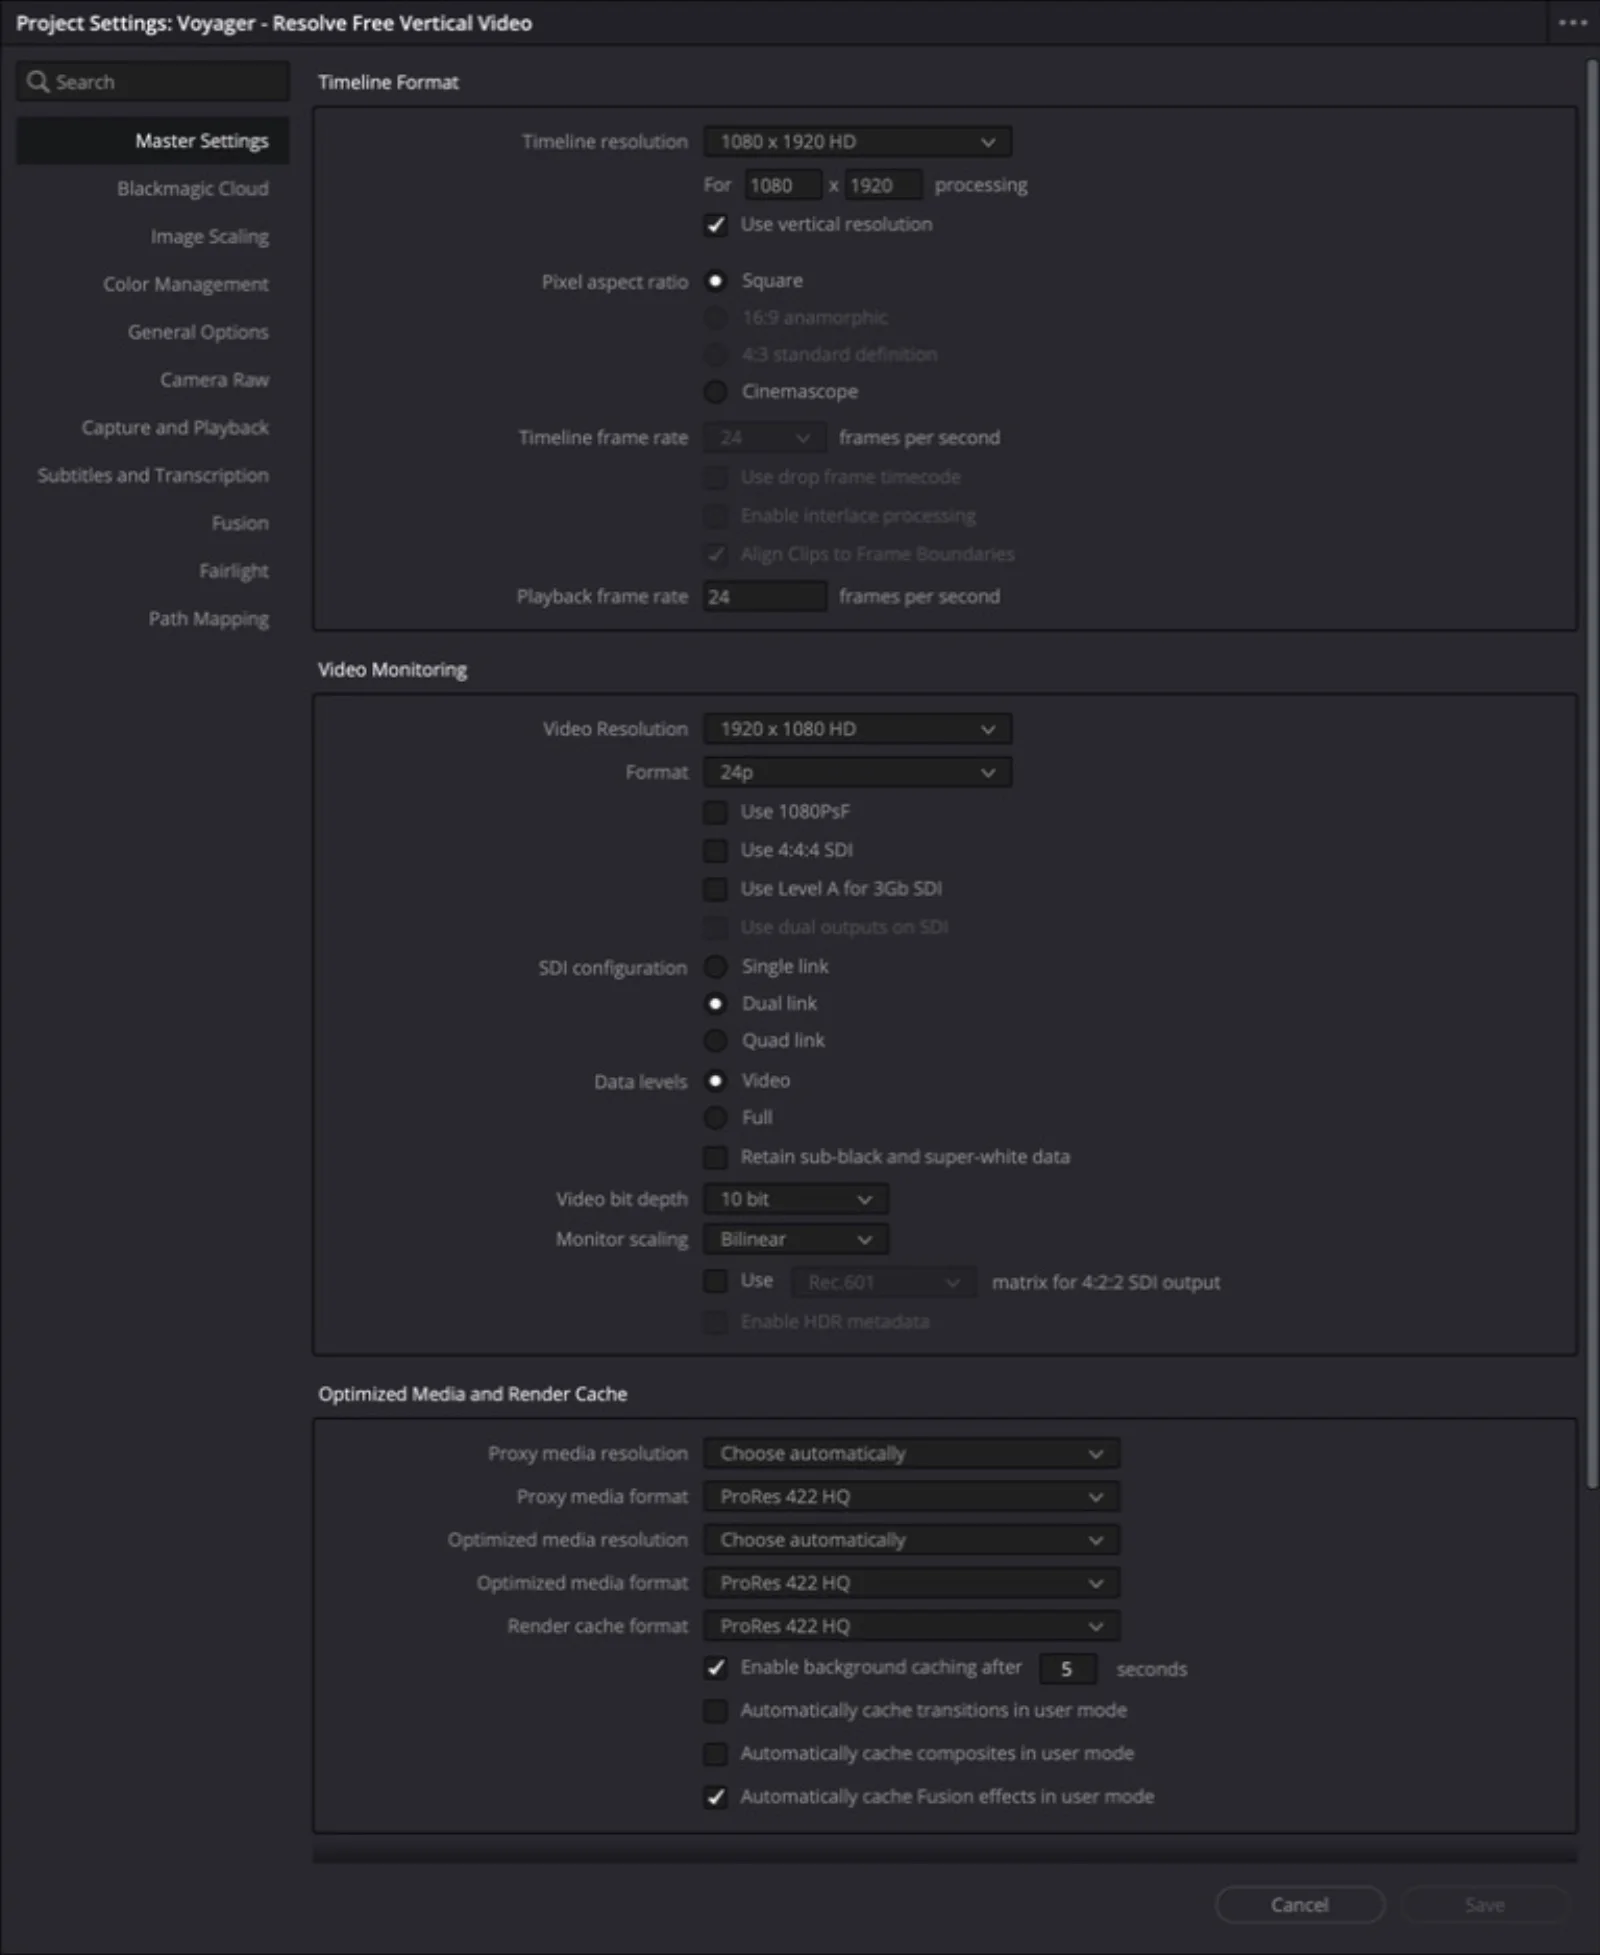
If you already have a horizontal timeline, duplicate it and open the duplicate's Timeline Settings from the Media Pool. Disable Use Project Settings for that timeline before setting its portrait dimensions. This lets the two versions use different resolutions without changing the entire project's defaults.
For the downloadable example, all three comparison timelines are already portrait. Import the DRP project file through Resolve's Project Manager and relink horizontal-source.mp4 from the bundle if the media appears offline.
2. Decide whether to fit the whole shot or fill the frame
Select a clip on the Edit page. In Inspector → Video, expand Retime and Scaling and find Scaling. This is the per-clip choice; using it lets different clips keep different framing treatments.
| Choice | What happens | When it makes sense |
|---|---|---|
| Fit | Keeps the whole picture, adding empty space where the shapes do not match | Screen recordings, wide diagrams, or shots where both edges matter |
| Fill | Fills the portrait frame and crops the sides of a horizontal source | A person, product, or other subject you can isolate within a narrower composition |
| Stretch | Changes the proportions to reach the frame edges | Usually unsuitable for footage where people, products, or circles must keep their shape |
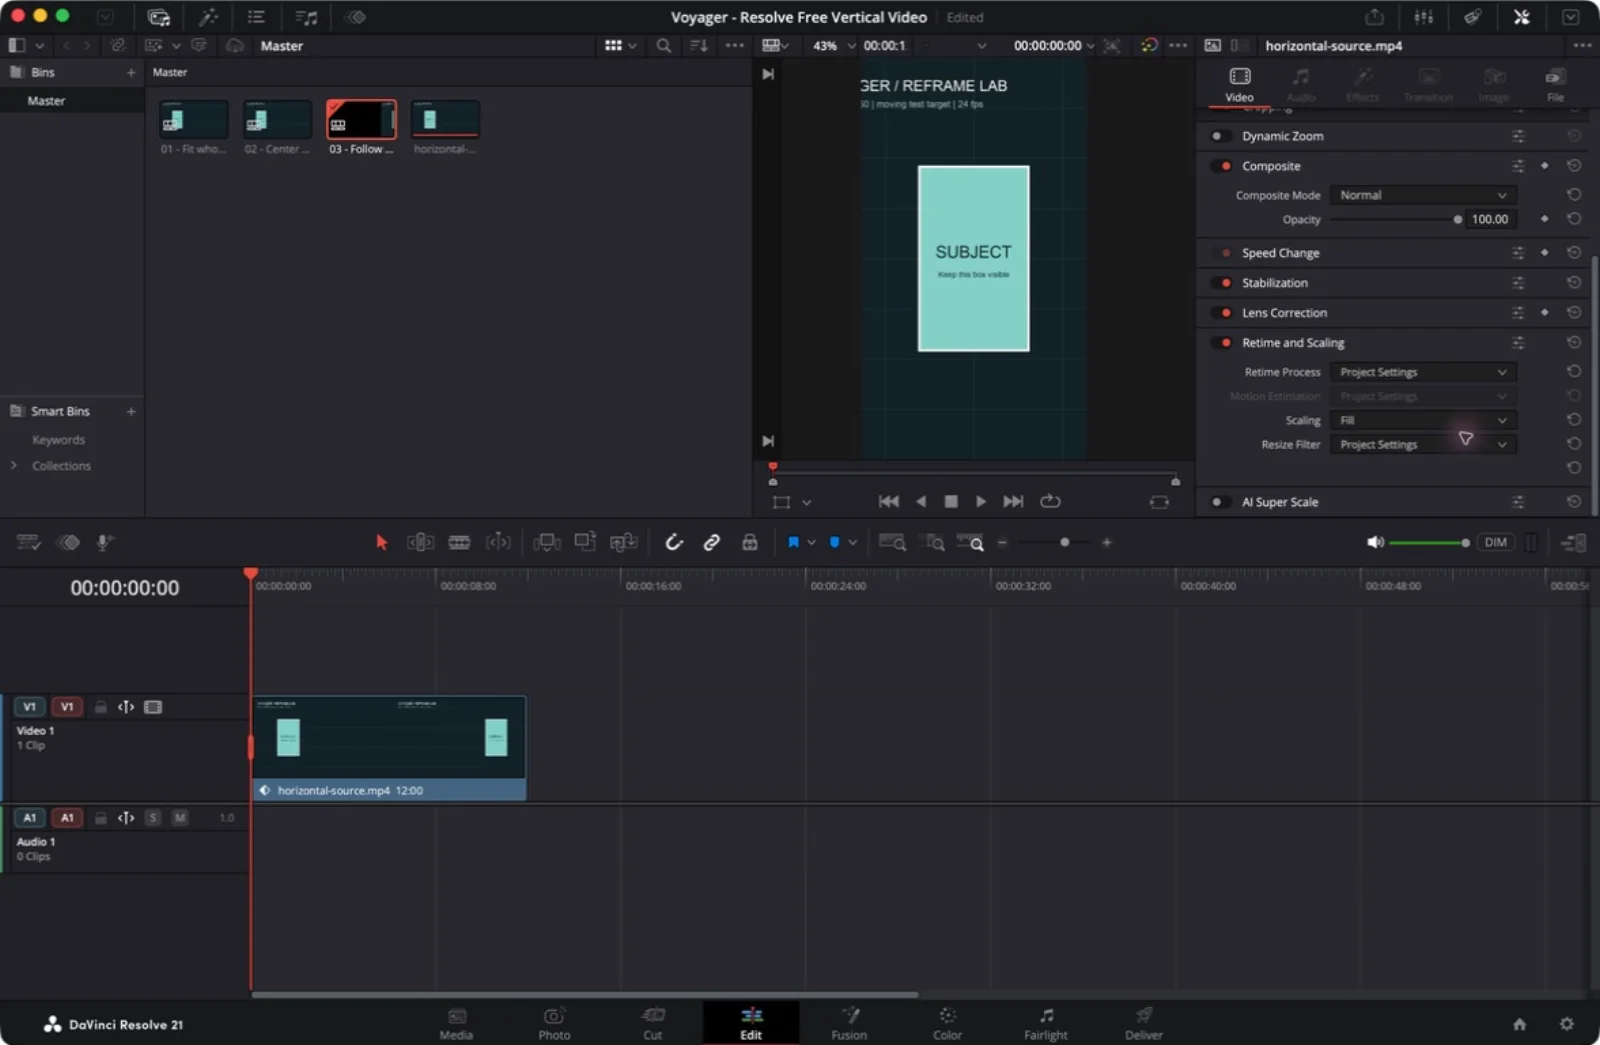
Fit is not a mistake. If the reader needs to see an entire application window, cropping away its controls may be worse than leaving space around it. You can use that space for a title, explanation, or other layout elements.
For our test, Fit makes the subject much smaller. A 3840×2160 image fitted into a 1080-pixel-wide canvas is only about 608 pixels high, leaving substantial space inside the 1920-pixel-tall frame.
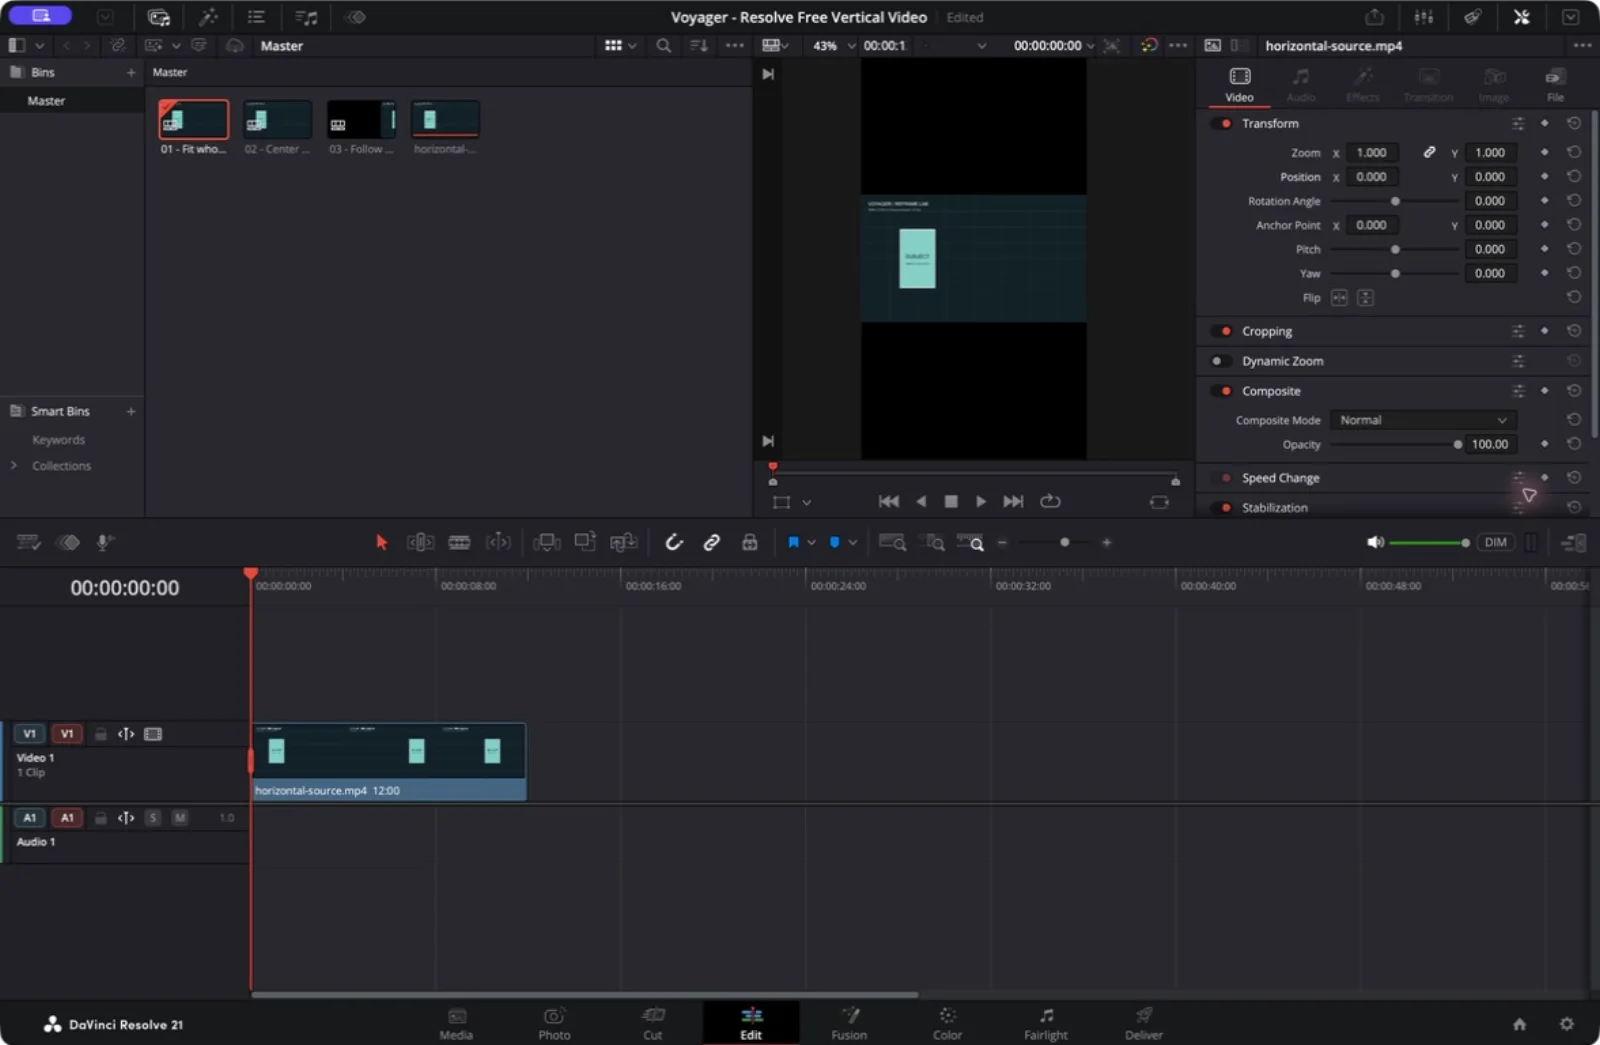
Fill uses the source's height instead. In this example, the portrait view shows roughly 1,215 of the source's 3,840 horizontal pixels at any one time. About two-thirds of the original width sits outside the frame. The editing decision is which part to keep.
3. Position the subject before adding animation
With the clip selected, return to Inspector → Video → Transform. Use Position X to move the picture left or right until the subject sits where you want it in the portrait viewer.
You are moving the image behind a fixed frame. If the subject is toward the left side of the source, moving the image right brings that subject toward the center of the portrait view. Use the viewer to judge the result rather than trying to remember a sign convention.
Keep Zoom X and Y linked if you need to resize further, so the subject retains its proportions. In the verified comparison, the imported Fill sizing already fills the frame at Transform Zoom 1.000. Applying another large zoom would crop much more than intended.
Do not copy a position value from a tutorial and assume it will work on your clip. Resolution, source placement, and the active sizing mode affect the result. During preparation of this example, imported transform values pushed the picture out of view; adjusting them in Resolve and checking the render caught the error.
For a stationary subject, a single position may be enough. For a moving subject, scrub through the shot. If they leave the frame, the position needs to change over time.
4. Add position keyframes where the motion changes
A keyframe records a setting at a particular moment. With position keyframes, Resolve fills in the movement between those recorded positions.
Start with a small number of useful anchors:
- Move the playhead to the first visible frame of the clip.
- Set Position X for the opening composition, then enable the keyframe diamond beside Position.
- Move to a point where the subject has moved significantly or changes direction.
- Adjust Position X again. With animation enabled, that creates another position keyframe.
- Repeat near the end, then check the movement between the anchors.
Our test target travels left to right, turns around at six seconds, and returns. A keyframe at the turnaround is essential. Using only matching start and end positions would leave the crop stationary while the subject moved away and back.
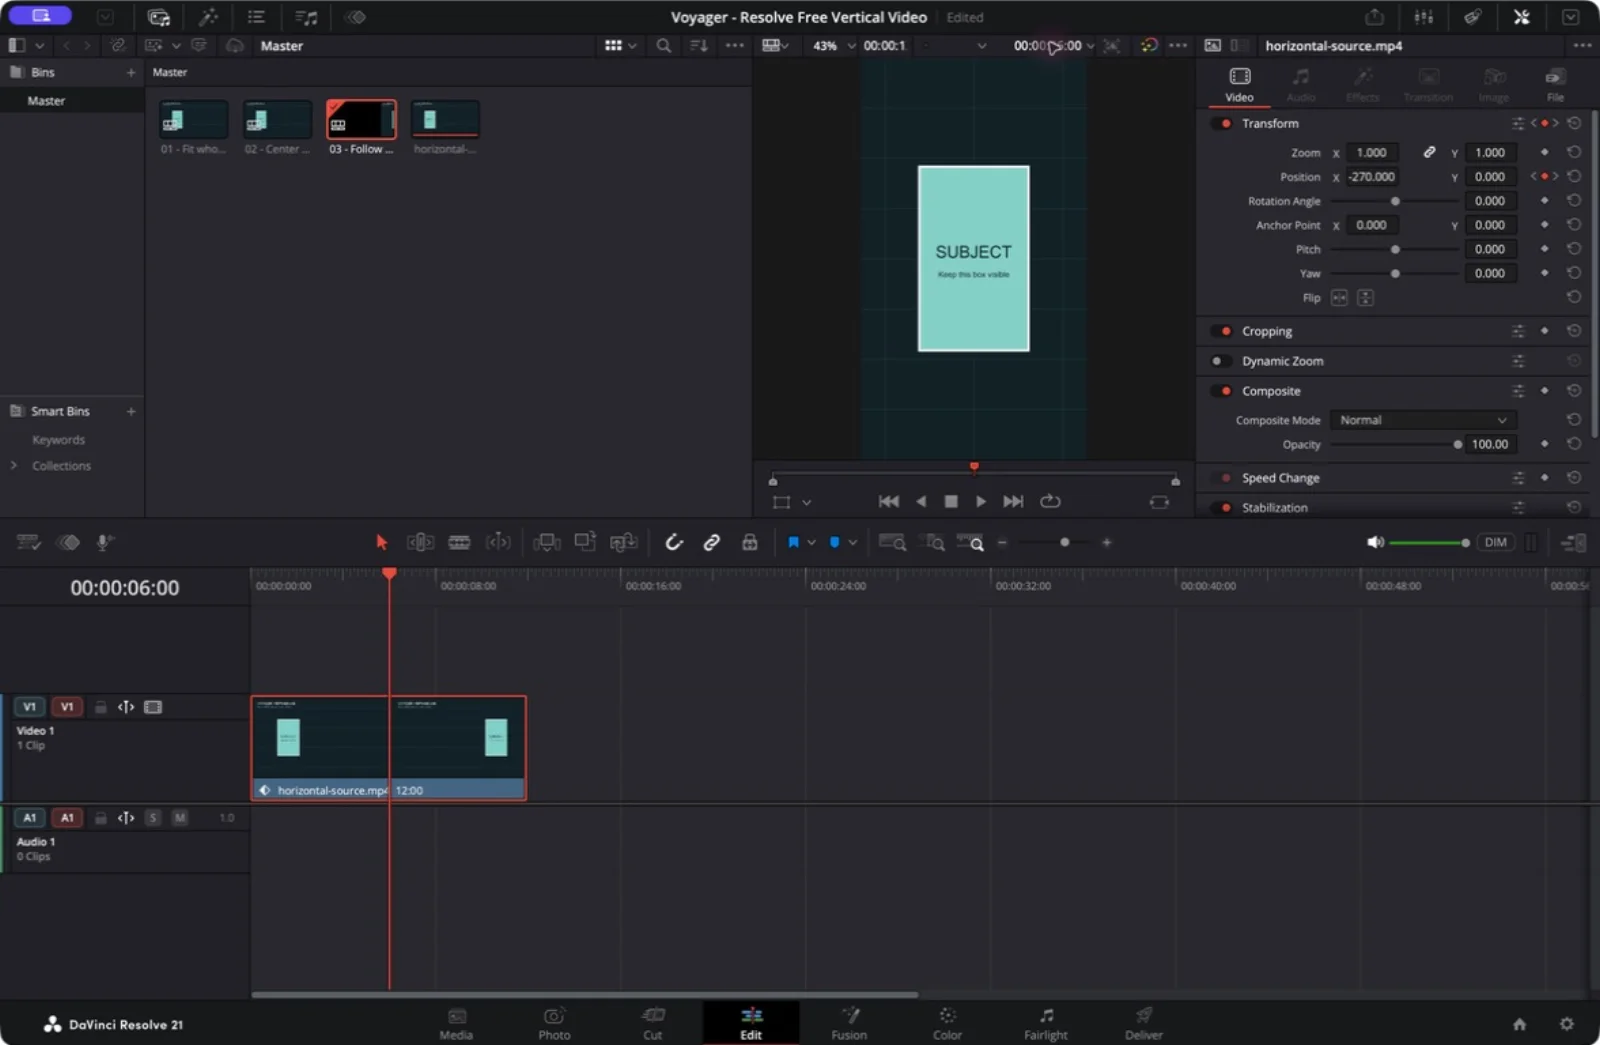
For the supplied project, the verified Position X values are +270 at zero seconds, −270 at six seconds, and +270 at the 12-second end boundary. These are specific to the test source and its imported sizing mode. The final visible frame is 11:23 at 24 fps; the endpoint defines the interpolation up to the clip's end. When working manually on your own footage, frame the last visible moment by eye instead of copying those numbers.
The sample uses linear motion between anchors because the test target moves at a constant speed in each direction. Real footage may need different timing. Add an intermediate keyframe when the subject speeds up, slows down, or changes direction; do not assume that changing the endpoints will fix everything between them.
5. Watch the spaces between your keyframes
A framing pass is not finished when three still frames look correct. Play the entire shot and check:
- Whether the subject's head, hands, or product edges get clipped between anchors.
- Whether the crop moves before the subject does or keeps moving after they stop.
- Whether the image edge enters the picture and creates a black strip.
- Whether text or other important material from the wide version has been cropped away.
In the center-crop export, our target disappears entirely at the beginning, the turnaround, and the end. In the keyframed export, a color-based check found it inside the frame throughout all 288 frames. This is a controlled moving-box demonstration, not a benchmark of tracking people or complex camera movement.
Avoid animating the crop just because you can. A fixed composition that comfortably contains the action may be easier to watch than a crop that reacts to every small movement. When a shot has two important subjects far apart, consider Fit, a split layout, or a cut to a different view instead of trying to squeeze both into one narrow crop.
Place titles and captions for the vertical composition after choosing the framing. Text baked into the horizontal source can disappear with the cropped edges. In our diagram, the wide header is deliberately not preserved in the filled versions; keeping the subject visible does not preserve every other part of the original design.
6. Export the portrait dimensions, then check the file
On the Deliver page, choose your output format and confirm that the render resolution is 1080×1920, either explicitly or through Timeline Resolution. Keep the intended frame rate. Add the job to the render queue and render it.
Open the exported file outside Resolve. Check that it is genuinely portrait, that the timing is correct, and that the subject remains visible through the whole shot. A portrait-looking image inside a horizontal export is not the same deliverable.
Our three native exports are each 1080×1920, 24 fps, and 12 seconds long. The comparison video at the top arranges those exports side by side; the actual deliverables in the bundle are separate portrait videos.
Download the keyframed portrait result, or use the project to compare it with Fit and the center crop. The clips are silent so the framing is the only changing variable.
Do you need Smart Reframe or an AI assistant?
The workflow above uses ordinary sizing and Position animation in Resolve Free. Smart Reframe is a different tool: Blackmagic includes it among the DaVinci Resolve Studio features. For the broader upgrade decision, see Resolve Free vs Studio.
An AI assistant can help prepare the project without pretending to unlock Smart Reframe. For this example, Codex generated a source diagram and FCPXML timeline files, then the positions were adjusted and inspected in Resolve. FCPXML is a file format for exchanging editing decisions, including some animated transforms; Apple documents keyframe animation in the format.
If you use an assistant, give it the source dimensions, target dimensions, frame rate, and the moments you want to preserve. Ask it for a separate editable timeline, not a replacement for your existing project. Check the imported values and the rendered frames: a timeline that imports successfully can still have the wrong framing.
Once the picture works, you can continue with editable AI captions in Resolve Free or cleaning up the dialogue. Keep those as separate passes so a framing revision does not quietly change your audio or caption timing.
Test setup and files
The test ran in DaVinci Resolve Free 21.1 on macOS on September 18, 2026. The source is a generated 3840×2160 moving-target diagram, not camera footage or an AI-generated person. Its motion is known in advance; no subject-detection model was used.
Three timelines were imported through FCPXML. The subject-following positions were corrected in the native Inspector and all three versions were rendered in Resolve. The MP4 downloads preserve the native H.264 picture without re-encoding. The comparison player combines reduced-size copies of those three exports and adds labels.
The bundle includes the source, editable DRP project, FCPXML files, renders, fixture script, and verification report. The automated check used a color mask on 135×240 preview frames to locate the teal target. It supports the claim about this test target remaining inside the frame; it does not establish automatic tracking quality on arbitrary footage. Relink the source file after importing the DRP on another machine. The optional FCPXML files also need their local media paths updated.
Make your next project in Voyager
Create an account, download Voyager, and start making.